Adobe Photoshop is the most popular image-editing application
available for Macintosh and Windows-based computers.
What is Image?
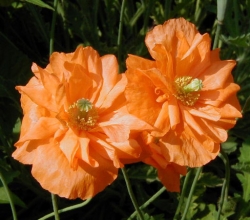
Photoshop considers an image not as a
whole picture, but as a mosaic made from square tiles of various
colors. These little squares are called pixels. Because there
are many-many pixels in an image, we see the whole image but not the
unrelated collection of colored squares. But as we zoom in, we start
to see that the image is indeed composed of squares.
Photoshop works not with image as a whole but with
its individual pixels (although we might not notice it when we ask
Photoshop to do something for us).
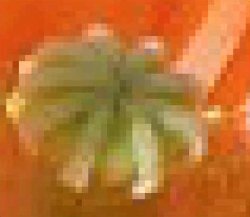
Image Size and Resolution
These are two important features of an image. As you might guess the image size is the physical dimensions of the image. Resolution is the number of pixels per linear inch (ppi). Assuming the number of pixels in image is fixed, increasing the size of an image decreases its resolution and vice versa.
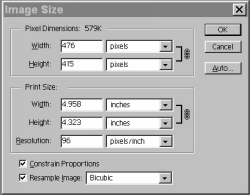
To play with image size and resolution go to menu Image > Image Size.
Enlarging or reducing an image w/o changing the number of pixels in the image is called resizing. To resize the image, turn off the Resample Image checkbox and enter new value for width or height or for image resolution. Resampling an image means scaling it so the image contains a larger or smaller number of pixels. The difference is that you leave the Resample Image checkbox turned on, and enter new width or height of the image. Generally it is advised to use resample to decrease image size and not to increase it. When you increase image size, you ask to add pixels to your image. Photoshop uses interpolation to do that and usually interpolated image does not look better than the original.
Another very useful tool for changing number of pixels in an image is Crop tool . Cropping means to clip away pixels around the edges of an image without harming the remaining pixels. Cropping enables you to focus on an element in your image. To select the crop tool press the 'C' key. Drag with the crop tool to create rectangular area that surrounds the portion of the image you want to retain. Press 'Enter' to finish cropping.
Printing Image
The higher resolution you have, the sharper and clearer the printed image will be. An image that is sent to a printer should have at least 150 ppi resolution. Otherwise it will look grainy. So there is a dilemma and you cannot do much about it: the printed image is either large and a little bit grainy or small and sharp. To increase the resolution of image use resizing, as described in the section above.
Image Formats
Photoshop 5 supports more than 20 file formats. And like most programs, Photoshop offers its own native format (.psd), the format optimized for Photoshop's particular capabilities and functions. The downside of that format is that not a lot of applications can open it. There are 2 mostly used formats: JPEG and TIFF. JPEG has outstanding compression capabilities (so it allows you to save the disk space on the computer; or to speed up uploading/downloading), and TIFF is almost universally supported among graphics different applications.
Using Filters
Photoshop provide enormous amount of special effects which can be applied to an image. They are called filters. All filters fall into 2 broad categories: corrective and destructive. Corrective filters are tools that used to modify scanned images and to prepare them for printing or screen display. They allow to sharpen the image, to enhance color transitions, etc. Destructive filters produce cool effects, but they can destroy the image content so it might not be recognized anymore. The best way to learn the filters is to play with them.
The most commonly used filters are the ones from Filter > Sharpen menu. The sharpening filters allow to compensate for image elements which are slightly out of focus.
Layers in Photoshop
Photoshop allows to create several layers in the image. Each layer is independent from each other layer and adds a lot of flexibility for editing. A lot of stuff can be done using layers, like rotations, blending, reordering layers, but we will focus on application of layers to text manipulation.
Tip: To see the layers of the image, go to Window > Show Layers menu. A little Layers window will pop-up (this type of window is called palette in Photoshop).
Text Manipulation
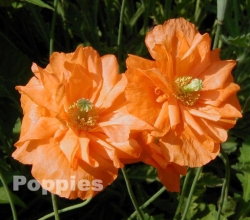
Photoshop 5 gives you a beautiful feature of editable type. Photoshop automatically creates type on a new layer, which allows you to change your type any time without modification of the rest of the image. To create a new layer of text, select the type tool -the one that looks as a solid T (or press T key). Then click in the image window. Photoshop displays the TypeTool dialog box. As long as you enter text in the dialog box, you can just simply drag the appearing text on the image to position it. Isn't it cool?
In case of the image on the left I also made layer with text translucent.
Photoshop also allows you to create vertical type. It creates vertical columns of type that read right to left. To get to this tool press Shift+T twice when the type tool is active.
When editing vertical type, you can check Rotate check box to rotate each character 90 degrees and to achive the result shown on the left.
History Palette
This is very useful palette and can be brought to display by clicking on Window > Show History. It shows you all the actions you performed from the time you saved your image, and allows you to go one or more steps back (kind of "Advanced Undo" feature)
If you want to know more about Photoshop
The best book I've seen about the Photoshop is "Photoshop 5 Bible" by Deke McClelland